
As the holiday season approaches, you might be considering ways to elevate your festive look. Sparkling snowflake nail designs can add a touch of winter elegance to your style. Whether you prefer classic white on a deep blue or intricate 3D embellishments, there’s a design that can reflect your personality while celebrating the season. With a variety of techniques and styles to explore, you’re bound to find something that catches your eye. But which design will truly make your nails the highlight of your holiday gatherings? Let’s uncover some dazzling options.
Key Takeaways
- Classic snowflake designs in white, blue, and red can transform your nails into a winter wonderland perfect for the holidays.
- Use stamping techniques to easily create intricate snowflake patterns with icy colors and a glossy top coat for added shine.
- Experiment with frosty French tips by applying white polish to the tips of icy blue or shimmering silver base colors for a chic look.
- Add rhinestones or 3D embellishments to your snowflake designs for extra sparkle and a festive touch that catches the eye.
- Explore whimsical colorful snowflakes using vibrant base colors and glitter for a playful and unique holiday nail art statement.
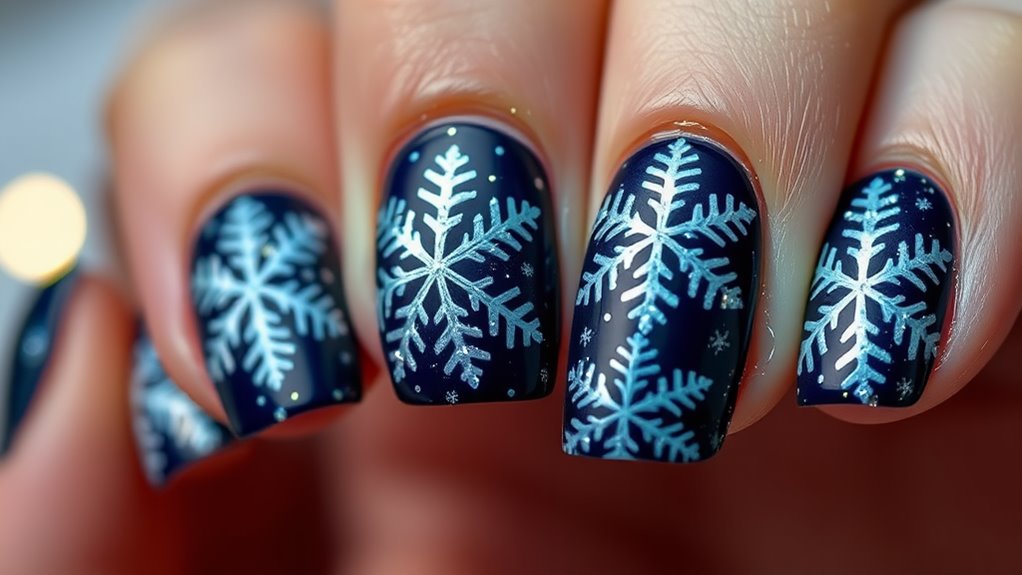
Classic White Snowflakes
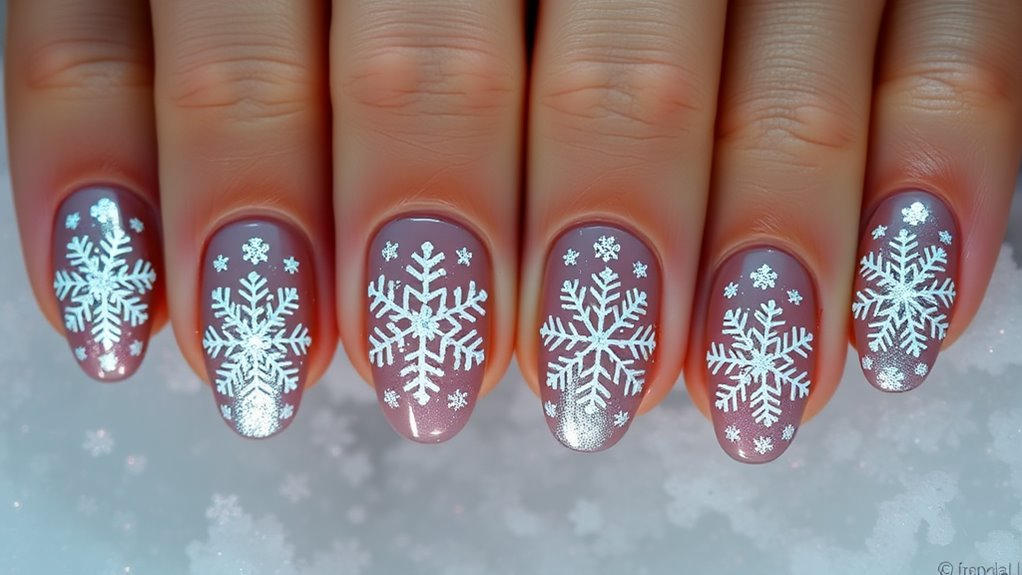
When it comes to holiday nail art, classic white snowflakes can transform your manicure into a winter wonderland. Imagine showing off your nails, each one delicately adorned with these charming designs. It’s like having little pieces of winter on your fingertips! You can easily achieve this look at home or by visiting a nail salon.
Start with a fresh coat of your favorite base color—perhaps a soft blue or a deep red. Once that’s dry, grab a thin brush or a dotting tool. Dip it into white polish and begin creating your snowflakes. They don’t have to be perfect; in fact, the quirks give them character!
Try different shapes, like tiny stars and intricate lace patterns. For an extra touch of fun, you could even mix in some shimmering topcoat for a frosty effect. Imagine the compliments you’ll get when people notice your festive nails!
Glitter Ombre Snowflakes
For a dazzling twist on traditional holiday nails, consider glitter ombre snowflakes. This design beautifully blends colors and sparkles, making your nails the star of any party.
Start with a base coat in a soft color like pale blue or white. Then, choose a glitter polish that matches your theme—think silver or gold for a touch of elegance!
Next, apply the glitter polish at the tips of your nails, gradually fading it down toward the base. This ombre effect creates a stunning gradient that’s both fun and festive.
Once you’ve achieved the look you want, it’s time to add the snowflakes. You can use a nail art brush or a stamping plate to create delicate snowflake designs. Don’t worry if they’re not perfect; a little imperfection adds charm!
Finish with a top coat to seal everything in and give your nails that glossy finish.
With glitter ombre snowflakes, you’ll have a unique nail design that sparkles as bright as your holiday spirit. So grab your nail supplies and let your creativity shine—your nails will be ready to impress everyone at the holiday gatherings!
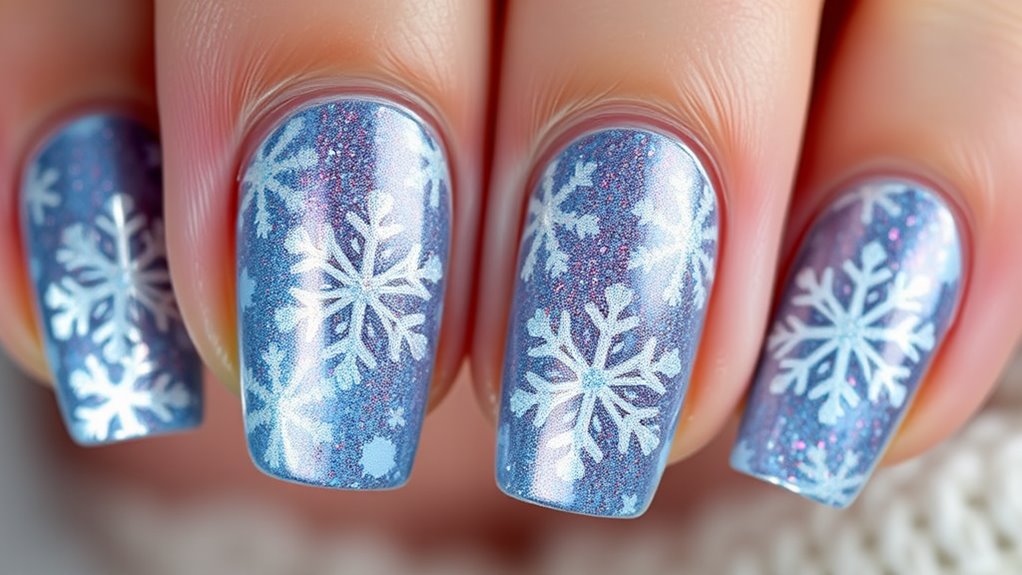
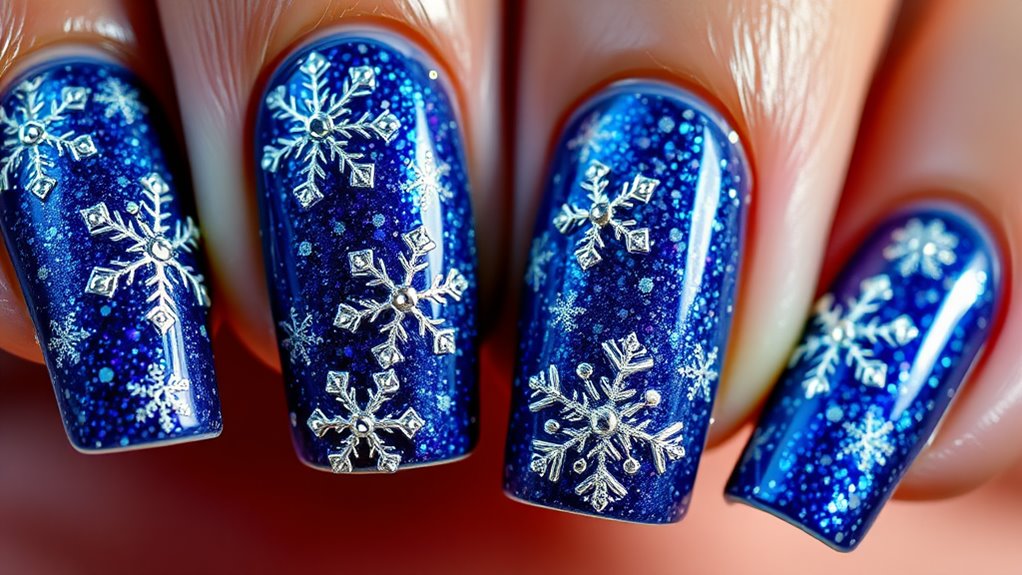
Blue and Silver Beauty
Embracing the winter wonderland theme, blue and silver beauty nails create a stunning visual impact that’s perfect for the season. Imagine stepping into a room and your nails sparkling like freshly fallen snow! Using a rich blue polish as your base, you can easily set the scene for a frosty masterpiece.
Add a touch of silver, whether through glitter or metallic polish, and watch your nails transform into festive works of art. You could even incorporate silver snowflakes or stars, making it feel like you’ve captured a piece of the winter sky right on your fingertips.
Don’t worry if you’re not a nail artist; you can use nail stickers or stamping plates to achieve that dazzling look without the extra stress.
Plus, if you’re feeling adventurous, you can mix different shades of blue to create a gradient effect that mimics the beauty of a twilight winter evening.
Minimalist Black Snowflakes
Against a backdrop of crisp white, minimalist black snowflakes offer a chic and modern twist on winter nail art. If you’re looking for a stylish way to embrace the season, this design is perfect for you!
Picture your nails adorned with delicate black snowflakes that pop against a fresh coat of white polish. It’s simple yet striking, making it a go-to choice for any holiday event.
To achieve this look, start with a smooth white base. Once it’s dry, grab a fine nail art brush or a dotting tool, and dip it into black polish. You can create different snowflake designs—some can be classic six-pointed shapes, while others can be more abstract.
Don’t stress about perfection; the charm lies in the minimalist vibe.
To add a touch of sparkle, consider using a glittery topcoat over the black snowflakes. This little detail can really make your nails shine! Plus, it’ll give you the perfect excuse to show off your festive flair.
Pastel Winter Wonderland
Transform your nails into a dreamy pastel winter wonderland with soft hues that evoke the magic of the season. Imagine delicate blues, gentle pinks, and minty greens swirling together, creating a beautiful canvas that reminds you of freshly fallen snow.
You can start with a light base coat in a soft pastel shade, then add some sparkling white or silver snowflakes for that extra twinkle.
To really bring the winter vibe, think about adding tiny stars or shimmering crystals. These little touches can make your nails look like a magical winter sky. Don’t be afraid to mix and match colors; a gradient effect can look stunning! Just paint from one pastel to another, blending them smoothly for a soft, dreamy look.
If you’re feeling adventurous, add some cute winter-themed decals, like snowmen or little mittens, to truly capture the spirit of the season.
Red and Gold Elegance
For a striking winter look, you can’t go wrong with red and gold elegance. This dazzling combination brings a touch of luxury to your nails, making them the perfect accessory for holiday parties or cozy gatherings.
Imagine your fingertips adorned with deep red polish, glimmering in the light, while golden accents dance across your nails like twinkling lights on a tree!
To create this stunning design, start with a rich red base coat. Once it’s dry, you can add gold glitter, stripes, or even tiny stars for an extra festive flair.
If you’re feeling adventurous, try some nail art stickers featuring holiday motifs in gold. Snowflakes, ornaments, or even little reindeer can really bring your design to life!
Don’t forget to seal your masterpiece with a top coat to keep that shine intact. You’ll be turning heads and spreading holiday cheer wherever you go.
Plus, red and gold is such a classic pairing that you’ll wear it year after year, and it’ll never go out of style!
Geometric Snowflake Patterns
Create a mesmerizing winter wonderland on your nails with geometric snowflake patterns. These designs aren’t just pretty; they’re fun, too! Imagine tiny snowflakes, each with its own unique shape, swirling across your fingertips. By using straight lines and angles, you can create a chic and modern look that stands out.
Start with a base coat to protect your nails. Once that’s dry, pick a soft winter color like icy blue or frosty white. Then, grab a thin nail art brush or a dotting tool. With precision, you can draw snowflake outlines, using triangles, squares, and lines to form dazzling shapes.
Don’t worry if they’re not perfect—remember, nature is all about uniqueness!
Add some sparkle by using glitter polish or a shimmering top coat. It’ll catch the light and make your geometric snowflakes shine even brighter! You could even mix and match patterns on different nails for a playful feel.
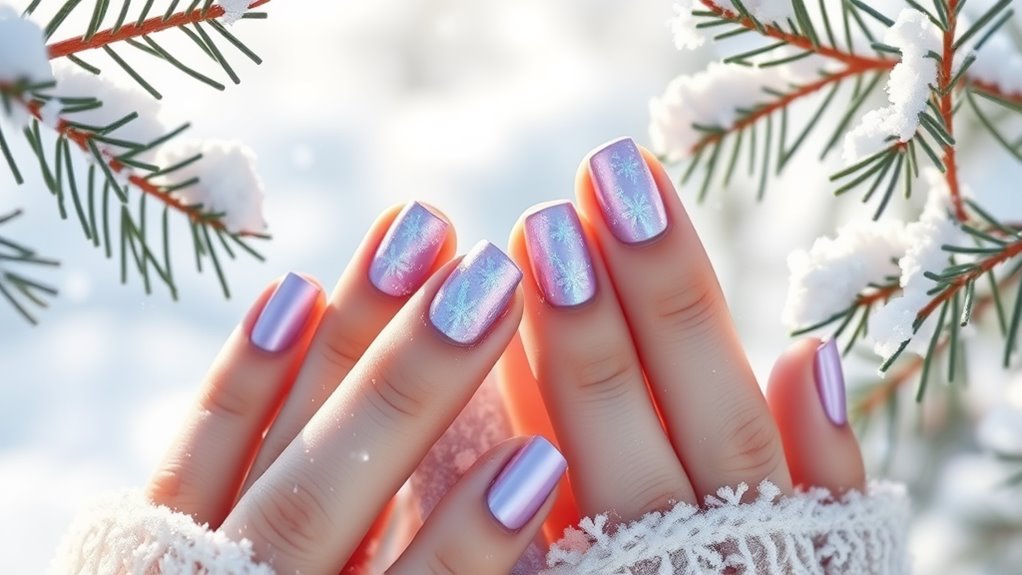
Metallic Snowflake Accents
With a touch of glamour, metallic snowflake accents can elevate your winter nail design to a whole new level. Imagine your nails twinkling like freshly fallen snow under the moonlight!
Adding metallic shades like silver, gold, or even rose gold can create a stunning contrast against your favorite winter polish. These accents not only catch the light beautifully but also add a festive flair to your look.
To create these dazzling designs, you can use metallic nail polish or nail stickers shaped like snowflakes. Just grab a dotting tool or a thin brush, and you’re ready to go!
Place the metallic snowflakes randomly for a whimsical effect, or organize them for a more polished appearance. Don’t forget to seal everything with a top coat to keep your masterpiece intact!
Feeling a bit adventurous? Try layering different metallic colors to create depth and dimension. It’s like a winter wonderland right at your fingertips!
Trust us, you’ll be the center of attention at every holiday gathering. So grab your nail supplies, and let your creativity shine with these playful metallic snowflake accents. Your nails will sparkle, and you’ll feel fabulous!
Charming Snowflake Stamping
Snowflake stamping offers a fun and effortless way to achieve intricate winter nail designs at home. You don’t need to be a nail art pro; with just a few tools, you’ll be creating charming snowflakes in no time!
Start by picking a nail polish color that screams winter—think icy blues, frosty whites, or even sparkly silvers. Next, grab a snowflake stamping plate. These plates usually come with various designs, so you can mix and match to your heart’s content.
Once you’ve got everything ready, apply a base coat and let it dry. Then, paint your chosen snowflake design onto the stamping plate, scrape off the excess polish, and press a stamper onto it. Gently roll the stamper onto your nail, and voilà! You’ve got a dazzling snowflake right on your fingertip.
Don’t worry if it doesn’t turn out perfect the first time—practice makes perfect! Add a top coat to seal in your design and give it that extra shine.
Snowflake stamping isn’t just easy; it’s one of the most enjoyable ways to get into the holiday spirit. So, gather your supplies and let your creativity flow!
Frosty French Tips
Frosty French tips bring a chic and wintry twist to the classic manicure. Imagine your nails with a fresh, white tip that looks like it just kissed a snowy landscape! Instead of the usual nude or pink base, you can choose a soft, icy blue or even a shimmering silver. It’s like wearing winter magic at your fingertips!
To achieve this look, start with a clean nail. Paint your chosen base color and let it dry completely. Then, take a white polish and carefully apply it to the tips, creating that frosty effect. You can play around with the shape, too! A classic straight line is lovely, but why not try a slight curve for a softer look?
For an extra touch, consider adding a bit of glitter on top to mimic the sparkle of fresh snow. Just a sprinkle will do—too much can turn your elegant design into a glitter bomb!
This style is perfect for holiday parties, family gatherings, or even just to brighten up a chilly day. So go ahead, give your nails a frosty makeover, and let them shine bright this season! You’ll be the talk of the town!
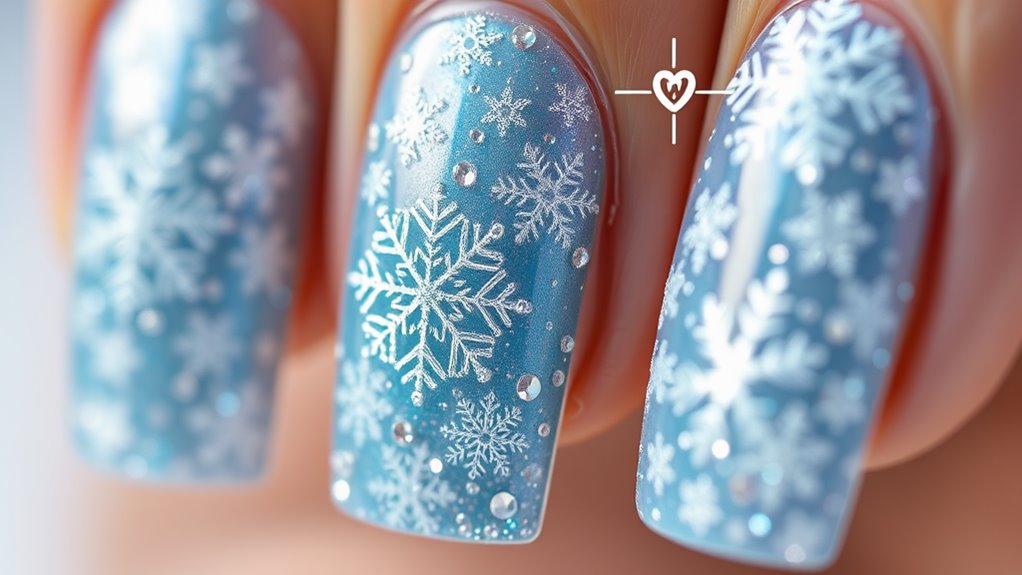
Rhinestone-Studded Snowflakes
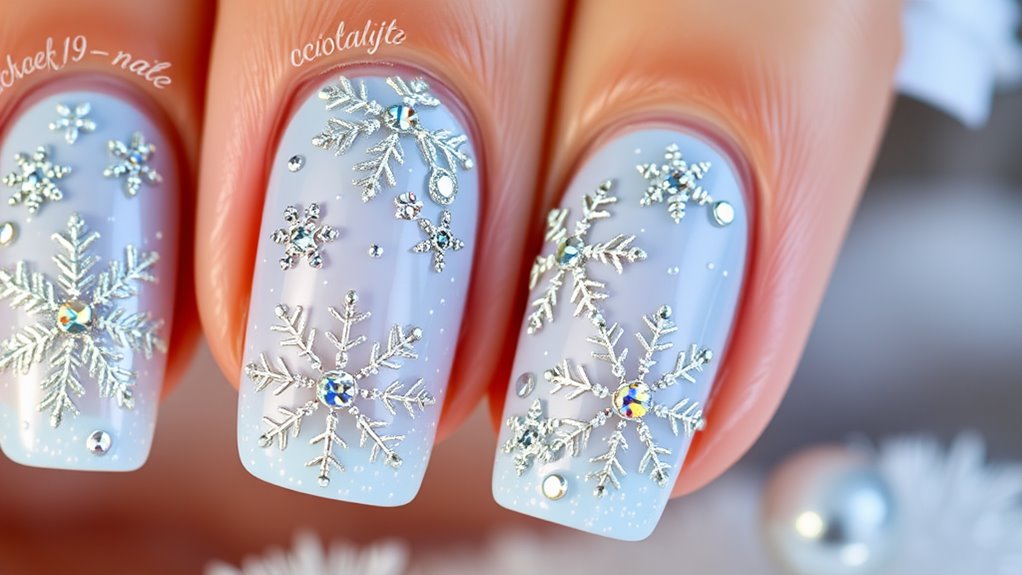
After adding a chic touch with frosty French tips, why not elevate your manicure further with rhinestone-studded snowflakes?
These dazzling designs will make your nails sparkle brighter than the holiday lights! Imagine tiny, glimmering snowflakes adorned with rhinestones that catch the light every time you move your hands. It’s like wearing a tiny winter wonderland right on your fingertips!
To create this stunning look, start with a solid base color—think icy blues or frosty whites. Once that’s dry, use a fine brush to paint delicate snowflakes on your nails.
Don’t worry about perfection; snowflakes come in all shapes and sizes! Next, carefully place your rhinestones in the center of each snowflake. You can use a dotting tool or even a toothpick for precise placement.
Seal it all with a top coat to keep those sparkles safe and sound. Trust me, you’ll feel like a holiday queen with this manicure!
Plus, it’s a great conversation starter at any festive gathering. So, grab those rhinestones and get ready to show off your fabulous, sparkling nails this season! Your fingertips will be the star of every holiday party!
Gradient Glitter Snowflakes
Transform your nails into a stunning winter masterpiece with gradient glitter snowflakes! This design captures the magic of the season, making your fingertips sparkle like fresh-fallen snow. To get started, pick a base color that reflects your holiday spirit, like a soft blue or icy white.
Once your base coat dries, it’s time to create that gorgeous gradient effect. Use a makeup sponge to dab on two or three complementary colors, blending them from the tips of your nails to the base. This step is essential for achieving that dreamy, ombré look.
Now, let’s add the glitter! Choose a fine glitter polish and apply it generously to the tips of your nails, letting it fade towards the base. This will give the illusion of shimmering snowflakes dancing in the light.
For the finishing touch, use a snowflake stamp or nail art brush to add delicate snowflake designs over the glitter.
Don’t forget a top coat to seal everything in place. You’ll be the talk of the holiday party with your fabulous gradient glitter snowflakes, radiating winter wonder with every hand gesture! Enjoy showing off your creative flair!
Whimsical Colorful Snowflakes
Brighten up your winter look with whimsical colorful snowflakes! Who says winter has to be all about muted tones? This season, let your nails sparkle with vibrant hues that bring a playful twist to traditional snowflake designs.
Envision this: icy blue snowflakes dancing against a bright pink base or cheerful yellow flakes swirling on a deep purple background. The options are endless!
To create your whimsical masterpiece, start with a base coat in your favorite color. Once it’s dry, grab a thin nail brush and some nail polish in contrasting shades. With a steady hand, paint cute little snowflakes—think of them as tiny frozen stars!
You can mix and match colors to your heart’s content, making each nail a unique piece of art. Don’t forget to add some glitter for that extra sparkle—because who doesn’t love a little bling?
Finish with a topcoat, and you’ll have nails that’ll stand out at any holiday gathering. So grab your polish and let those colorful snowflakes fly!
With a fun twist like this, you’ll be the star of winter festivities, and your nails will be the talk of the town. Happy painting!
Matte Finish Snowflakes
For a chic and sophisticated winter look, consider matte finish snowflakes on your nails. This trendy style takes your holiday manicure to a whole new level! Imagine soft, velvety nails adorned with delicate snowflakes that really pop without the shine. You’ll stand out at every holiday gathering!
To achieve this look, start with a matte base coat. You can choose classic winter colors like deep blues, icy whites, or even a muted silver. Once the base is dry, use a thin nail art brush or a dotting tool to create your snowflakes. Don’t worry if they’re not perfect; snowflakes in nature are all unique, right?
Finish with a matte top coat to seal your design and add that luxurious, non-shiny finish. Trust me, your nails will look effortlessly cool and totally festive!
And if you’re feeling adventurous, you can add a touch of glitter to a few snowflakes for a little sparkle without going overboard.
Matte finish snowflakes are a fun way to express your holiday spirit while keeping things classy. So grab your nail supplies and get ready to impress everyone with your chic winter nails! Enjoy creating!
Vintage-Inspired Nail Art
As you explore different styles for your winter manicure, vintage-inspired nail art offers a charming twist that evokes nostalgia. Think delicate lace patterns, classic polka dots, or pastel colors reminiscent of the 1950s. These designs aren’t just pretty; they tell a story, giving your nails a touch of history and elegance.
To create a vintage look, start with a soft base color like pale pink or mint green. Once it’s dry, use a fine brush to add intricate details, such as tiny flowers or swirls. You can even incorporate gold or silver accents for that extra sparkle, making your nails a real conversation starter at any holiday gathering!
Don’t shy away from experimenting with different textures either. Matte finishes combined with glossy tips can give your vintage design a modern edge.
And if you’re feeling adventurous, try a mix of designs on each nail—just like a quirky thrift shop find!
Snowflake Watercolor Technique
While winter often brings to mind chilly days and cozy nights, the Snowflake Watercolor Technique can transform your nails into a stunning canvas of frosty beauty. This technique is all about blending colors to create a dreamy, wintry effect that looks like a snowstorm on your fingertips!
To start, you’ll need a few nail polish shades—think icy blues, soft whites, and shimmering silvers. Grab a small makeup sponge, and you’re halfway there!
Apply a base coat to protect your nails, then use the sponge to dab the colors onto your nails, blending them together. It’s like painting with a twist!
Once you’ve got that gorgeous watercolor effect, it’s time to add the snowflakes. You can use a thin nail brush or a dotting tool to create delicate snowflake designs.
Don’t worry if they’re not perfect; nature isn’t perfect either! You can also add a top coat to seal in your masterpiece and give it that glossy finish.
3D Snowflake Embellishments
After achieving a stunning watercolor effect on your nails, you can take your winter manicure to the next level with D Snowflake Embellishments. These little beauties are like the cherry on top of your holiday sundae!
You’ll find them in various shapes, sizes, and sparkles, making them perfect for adding that extra wow factor to your festive look.
Applying D Snowflake Embellishments is super easy! Just grab your favorite nail glue or topcoat, and carefully place the snowflakes on your nails. You can mix and match different designs for a fun, layered effect.
Imagine the glimmering snowflakes dancing on your nails, catching the light as you wave hello to friends and family. It’s bound to bring smiles!
Don’t be afraid to get creative! Try placing some snowflakes at the tips of your nails or scattering them across the base for a magical winter wonderland effect.
And if you’re feeling adventurous, add some glitter or rhinestones around them for an even more dazzling look. Trust me, your nails will be the life of the holiday party, and you’ll be rocking those snowflakes like a pro!
Conclusion
Now that you’ve explored these 17 dazzling snowflake nail designs, it’s time to get creative and let your holiday spirit shine! Whether you go for classic whites or colorful glitter, your nails will be the talk of the party. Grab your tools, pick a design, and get ready to impress your friends and family. Remember, the only limit is your imagination! So, have fun and make your nails as festive as your holiday spirit!