
As Christmas approaches, you might be considering ways to add a festive touch to your look, and nail art can be a perfect avenue for that. With styles ranging from classic red and green combinations to intricate snowflake designs, there’s a plethora of options that cater to every taste. Whether you prefer something playful like jolly Santa faces or a more elegant approach with glittering gold tips, you’ll find plenty of inspiration here. Discover how to make your nails the highlight of your holiday celebrations, and you’ll be surprised by what you can create this season.
Key Takeaways
- Embrace classic red and green colors with fun nail art like holly leaves or candy canes for a festive look.
- Try candy cane stripes using red or white base colors, adding glitter or rhinestones for extra holiday cheer.
- Create winter magic with snowflake designs on cool blue or soft white backgrounds, enhanced with holographic polish.
- Add glamour with gold tips on nails painted in deep green or red, blending for a chic gradient effect.
- Experiment with whimsical reindeer and colorful ornament designs to showcase creativity and festive spirit on your nails.
Classic Red and Green
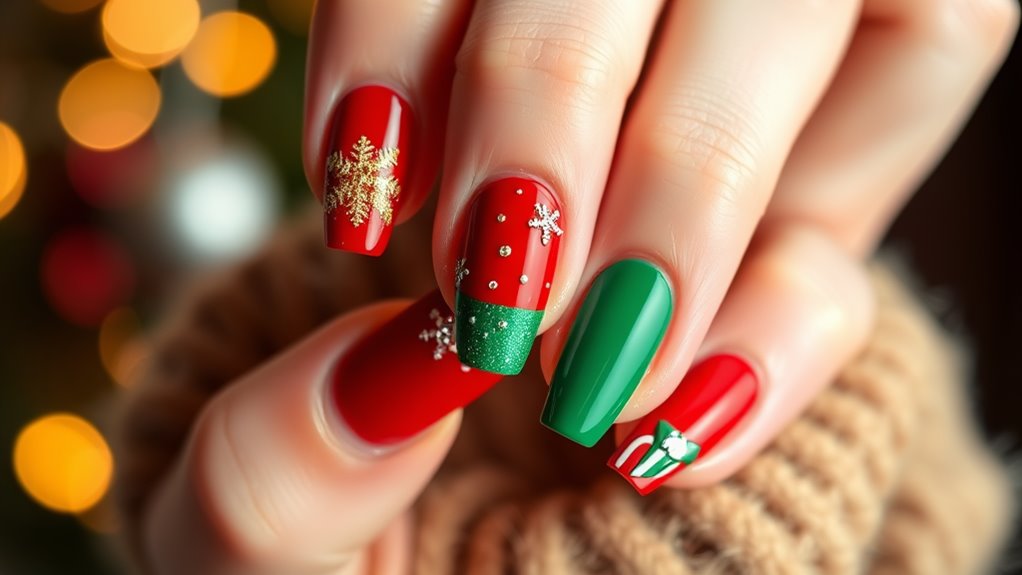
When it comes to holiday nail designs, you can’t go wrong with classic red and green. These festive colors scream Christmas cheer, and they’re perfect for any occasion, from family gatherings to holiday parties. You can easily create a stunning look by alternating your nails between vibrant red and deep green.
Feeling a little adventurous? Try adding some glitter or metallic accents! A sparkly top coat over red nails can have you shining like a Christmas ornament, while green nails with gold tips might just make you feel like the star on top of the tree.
Don’t forget about nail art! If you’re feeling crafty, paint tiny holly leaves or candy canes on a few accent nails. This little touch can instantly make your manicure stand out.
And let’s be real—what’s more festive than a little nail bling? Consider using nail stickers or gems to add that extra holiday sparkle.
You’ll not only feel fabulous, but you’ll also spread the joy of the season wherever you go. So grab your favorite shades, get creative, and let your nails be a canvas for your holiday spirit!
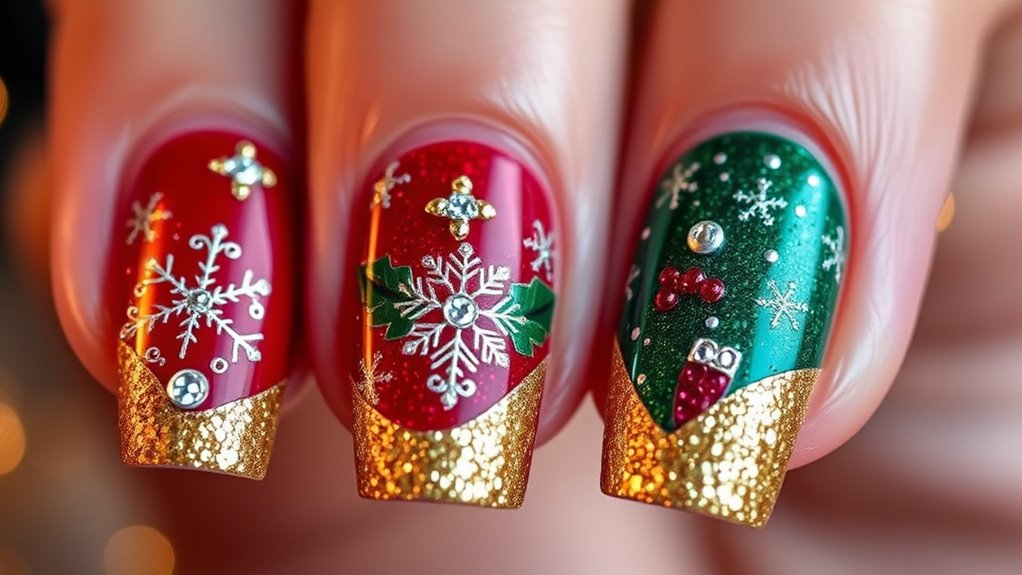
Snowflake Elegance
Snowflakes evoke a sense of winter magic, making them a perfect theme for your holiday nails. Imagine delicate, intricate snowflakes dancing across your fingertips, bringing a touch of elegance to your festive look.
To achieve this, start with a cool blue or soft white base coat that mimics the serene beauty of winter skies.
Once that’s dry, grab a fine nail art brush or a dotting tool to create your snowflakes. You can go for classic white, or if you’re feeling adventurous, try silver or even a shimmering holographic polish!
Don’t worry if your snowflakes aren’t perfect; each one is unique, just like the real ones.
For added flair, think about using tiny rhinestones to mimic the sparkle of freshly fallen snow. Just place them at the center of your snowflakes for a pop of glamour.
And don’t forget to seal your masterpiece with a good top coat to keep everything looking fresh and fabulous.
Glittering Gold Tips
As the holiday season approaches, adding a touch of glamour to your nails can elevate your festive spirit. Glittering gold tips are the perfect way to dazzle at any holiday gathering!
Picture your nails glinting in the light, catching everyone’s eye as you sip hot cocoa or unwrap gifts. It’s a simple yet striking look that makes your nails feel special.
To achieve this stunning style, start with a base color that complements the gold. Classic red or deep green are great choices, but don’t be afraid to get creative!
Once your base is dry, carefully apply a gold glitter polish to the tips. You can use an actual glitter polish or a gold foil for that extra bling.
Want to make it even more exciting? Try a gradient effect! Just blend the gold up from the tips, fading into your base color for a chic look that’s sure to impress.
Finally, seal it all with a top coat to keep your festive nails looking fabulous throughout the holiday season.
Reindeer and Ornament Designs
After you’ve dazzled everyone with those glittering gold tips, it’s time to elevate your festive nail game with whimsical reindeer and ornament designs.
Imagine tiny reindeer prancing across your fingertips, with their adorable red noses peeking out! You can paint a sweet little reindeer on your ring finger, complete with antlers and a cheeky smile. It’s sure to make everyone chuckle!
For the other nails, why not add some colorful ornaments? Use bright reds, greens, and golds to create shiny baubles that look good enough to hang on a tree! You can even try adding some sparkly details to your ornaments—glitter, anyone?
These designs aren’t just fun; they’ll definitely make you the center of attention at any holiday gathering.
If you’re feeling extra creative, mix and match! A reindeer on one hand and ornaments on the other will show off your festive spirit in a unique way. Plus, don’t forget to seal everything with a top coat to keep those designs shining bright.
Get ready to show off your holiday nails, and watch as everyone asks, “Where’d you get those?” Happy nail painting!
Festive Plaid Patterns
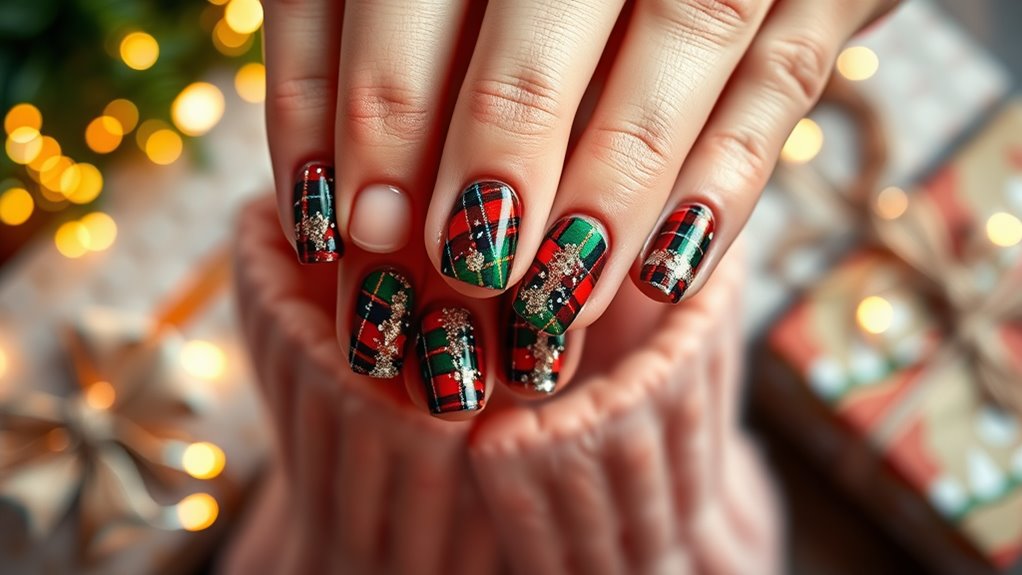
Get ready to deck out your nails in charming festive plaid patterns that capture the essence of the holiday season! Plaid is the perfect way to bring a cozy, cheerful vibe to your nails. You can go for classic red and green combos that scream Christmas, or try a more modern twist with blues and whites.
To create these eye-catching designs, start with a solid base coat. Once that’s dry, you can use nail tape to create sharp lines for that perfect plaid look. Just imagine the compliments you’ll get when your friends see your beautifully patterned nails!
If you’re feeling extra creative, why not mix and match different plaid patterns on each nail? That way, you’ll showcase your unique style while still keeping it festive.
Don’t forget to add a glossy top coat to seal the deal and make those patterns pop!
And hey, if you mess up a little, just call it “artistic flair.” Who doesn’t love a bit of handcrafted charm?
Christmas Tree Accents
Festive plaid patterns are just the beginning of your holiday nail art journey. Once you’ve nailed that look, why not add some delightful Christmas tree accents to really bring your festive spirit to life?
Imagine this: tiny, shimmering green trees hand-painted on your nails, adorned with colorful ornaments! It’s like having a mini Christmas party right at your fingertips!
You can choose to keep it simple with just one accent nail featuring a tree, or go all out and deck every nail with these cheerful designs. Don’t forget to sprinkle in some glitter for that extra sparkle—who doesn’t love a little bling during the holidays?
If you’re feeling adventurous, you might even try incorporating different shades of green, gold, and red to create a stunning ombre effect. It’s a fun way to show off your creativity.
Plus, you can use a dotting tool or a toothpick to add those cute ornaments.
Candy Cane Stripes

This holiday season, you can really amp up your nail game with candy cane stripes! These festive designs aren’t only fun but super easy to create. Grab some red and white nail polish, and you’re ready to go!
Start by painting your nails with a solid base color—either a classic red or a clean white. Once that’s dry, take a thin nail brush or striping tape, and carefully add your stripes.
You can go for thick stripes for a bold look or thin ones for a more delicate feel. If you’re feeling extra creative, why not mix it up with a diagonal or zigzag pattern? It’ll give your nails a unique twist that’ll make everyone do a double take!
For added flair, consider adding a glittery topcoat or some rhinestones to really make those stripes pop. Imagine the compliments you’ll get while sipping hot cocoa!
Plus, these nails are perfect for any holiday gathering, and they’ll get you in the spirit in no time. So, roll up those sleeves, grab your nail supplies, and get ready to rock some candy cane stripes this Christmas! Your nails will be the talk of the town!
Winter Wonderland Scene
Transform your nails into a magical winter wonderland with just a few simple steps! Imagine tiny snowflakes dancing across your fingertips and frosty trees glistening in the light.
Start with a pale blue or white base coat to mimic the serene sky or glistening snow. Once that’s dry, grab a thin nail art brush and white polish to paint delicate snowflakes. You can even sprinkle a little glitter on top for that extra sparkle!
Next, it’s time to create your winter scene. Use colors like deep green for trees and a touch of brown for tree trunks. Dot on some red for cute little ornaments or berries.
If you’re feeling adventurous, add tiny little cottages with warm yellow windows to complete your cozy vibe.
Don’t forget to seal your masterpiece with a top coat to keep everything looking fresh and shiny! And if you mess up, don’t worry—just call it “abstract art!”
With your winter wonderland nails, you’ll be ready to spread some holiday cheer wherever you go. So grab your nail supplies, put on some festive music, and let your creativity shine this Christmas!
Jolly Santa Faces

Get ready to paint your nails with jolly Santa faces that’ll bring a smile to everyone’s face! This festive design isn’t just fun; it’s an instant mood booster!
Envision this: your nails adorned with cheerful little Santas, complete with rosy cheeks, fluffy beards, and that classic red hat. You’ll be the talk of the holiday party!
To create your jolly Santa faces, start with a bright red base coat. Once that’s dry, grab a tiny brush or a dotting tool to paint Santa’s face. Use white for the beard and hat, and a little pink for those adorable cheeks. Don’t forget to add his twinkling eyes; they’re the key to capturing his merry spirit!
If you’re feeling adventurous, mix it up! Try painting Santa on just one or two accent nails, while keeping the rest of your nails a festive green or sparkly gold.
It’s like a mini holiday celebration on your fingertips! Plus, this design is a great conversation starter, so get ready to share your holiday spirit with everyone around you. After all, who wouldn’t love a little Santa cheer?
Happy painting!
Sparkling Holiday Gradient
After spreading holiday cheer with those jolly Santa faces, it’s time to elevate your festive nail game with a sparkling holiday gradient. Imagine your nails shifting from a rich, deep red at the base to a frosty white at the tips, just like a beautiful winter sunset! This look isn’t just eye-catching; it’s super easy to create.
To start, choose two or three complementary colors—think classic Christmas hues like green, gold, or silver. Paint your base color first and let it dry completely.
Then, grab a makeup sponge, dip it into your second color, and gently dab it onto the tips of your nails. This technique helps blend the colors seamlessly, creating that gorgeous gradient effect.
Now for the fun part! Add a touch of sparkle by applying a glittery top coat. It’ll make your nails shine brighter than the star on top of your tree!
Finally, seal the look with a clear top coat to keep that sparkle lasting all season long. With your sparkling holiday gradient, you’ll be the talk of every festive gathering, and trust me, everyone will want to know your secret!
Conclusion
So, there you have it! With these 10 festive Xmas nail ideas, you’re all set to dazzle this holiday season! Whether you choose cheerful Santa faces or elegant snowflakes, your nails will definitely add a sprinkle of joy to every celebration. Don’t be afraid to mix and match designs or add your own flair—after all, it’s your holiday spirit shining through! Grab your nail polish and get creative, because your festive nails are just waiting to shine!